I'm serious. And just to make it clear, I am talking about a gas stove. Adrienne and I have been cooking on old electric coil ranges for a couple of years now. As a matter of fact, our old house's range was temperature controlled by 3 buttons for each burner - low, medium, high. This is not the way foodies like to prepare their meals.
All is changed as of today - out with the old, in with the new. And the new is stainless steel with 5 burners fueled by pure, blue-flame producing GAS...the epitome of awesome.
Can't wait to see how dinner turns out tonight....
Thursday, July 1, 2010
Monday, June 28, 2010
our kitchen WILL rock!
Adrienne and I took an adventurous weekend break from our kitchen remodel, which was awesome - she wants to blog about it later, so I will offer no hints as to why it was awesome. But it was totally awesome. I will say no more.
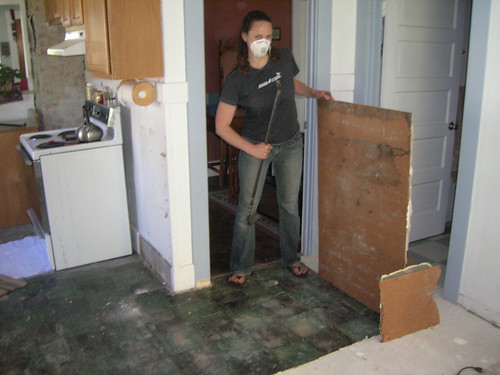
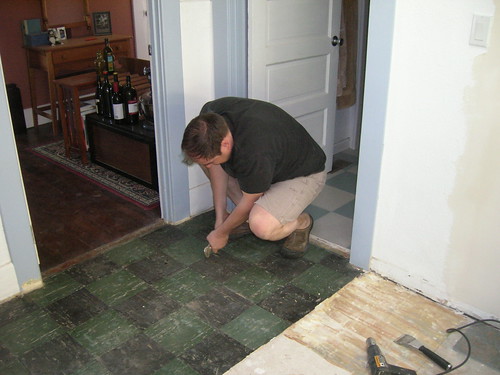
So our kitchen remodel continues. Plaster over old brick chimney - gone. Umpteen-layers of kitchen substrate (i.e., linoleum, marmolium, old hardwood floors, tar, glue, paper, faux-wood wall paneling, nailed every 3 inches...etc) - up. Decorative railing circumnavigating the kitchen walls - removed. Post supporting skylight infrastructure - replaced with exposed wood beam. Cheap checkerboard linoleum - trashed and replaced lovingly with quarried multi-colored stones. Cabinetry - being built. Sink - recycled hammered copper basin awaiting cabinets. Stove - here and waiting to receive a new gas line since only electric exists.
Yes, our kitchen WILL rock! Below are some updates of what we've been up to.
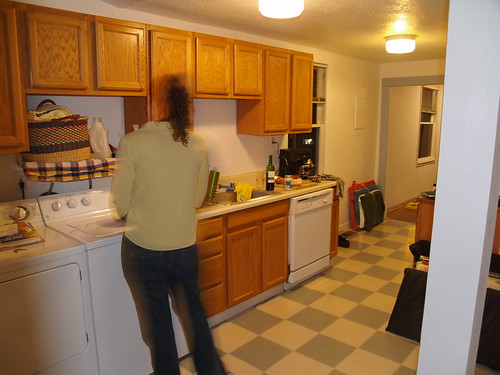
Our kitchen before... note the linoleum (which we will call "layer 1"), the white post obstruction, and the washer and dryer (used here as additional countertop).
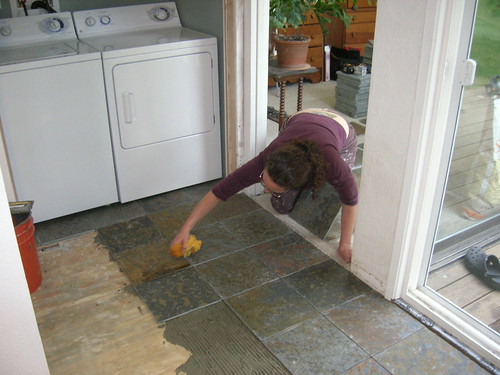
Wow! The washer and dryer in a closet. How revolutionary! And the beginnings of tiling...
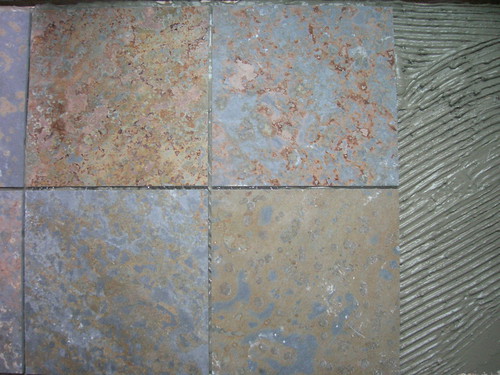
New tiles close-up. Cool, huh?!
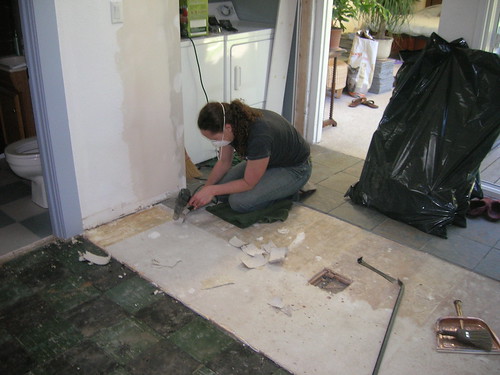
The subfloor of the old portion of the house and the addition built by previous owners (who apparently were not rocket scientists) are different heights - by a lot! So the tiles had to go directly onto the subfloor on the new portion of the house, and therefore, a layer of paper (let's call this "layer 2") had to go...
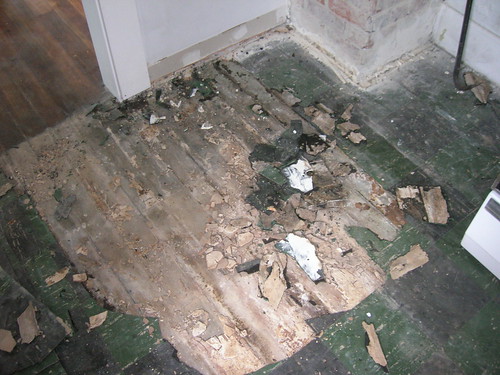
The layers under the linoleum: wall paneling (yes, wall paneling on the floor) and some type of particle board... "layers 3 and 4".
500 bajillion staples and nails...
And "layer 5", the old marmoleum, glued on with tar, of course!
So our kitchen remodel continues. Plaster over old brick chimney - gone. Umpteen-layers of kitchen substrate (i.e., linoleum, marmolium, old hardwood floors, tar, glue, paper, faux-wood wall paneling, nailed every 3 inches...etc) - up. Decorative railing circumnavigating the kitchen walls - removed. Post supporting skylight infrastructure - replaced with exposed wood beam. Cheap checkerboard linoleum - trashed and replaced lovingly with quarried multi-colored stones. Cabinetry - being built. Sink - recycled hammered copper basin awaiting cabinets. Stove - here and waiting to receive a new gas line since only electric exists.
Yes, our kitchen WILL rock! Below are some updates of what we've been up to.
Our kitchen before... note the linoleum (which we will call "layer 1"), the white post obstruction, and the washer and dryer (used here as additional countertop).
Wow! The washer and dryer in a closet. How revolutionary! And the beginnings of tiling...
New tiles close-up. Cool, huh?!
The subfloor of the old portion of the house and the addition built by previous owners (who apparently were not rocket scientists) are different heights - by a lot! So the tiles had to go directly onto the subfloor on the new portion of the house, and therefore, a layer of paper (let's call this "layer 2") had to go...
The layers under the linoleum: wall paneling (yes, wall paneling on the floor) and some type of particle board... "layers 3 and 4".
500 bajillion staples and nails...
And "layer 5", the old marmoleum, glued on with tar, of course!
And where we are today... cabinets going in this weekend or next so stay tuned!
Tuesday, May 11, 2010
chipping away...
As you can see from one of our recent posts, we are slowly trying to restore some of the charm that's been stripped from our little house over the years. We (and as in 'we' I mean John) uncovered our chimney from 3 different layers of plaster.
Here's the white wall where the chimney was covered:
And here's the uncovered chimney:
This is the beginning of our kitchen renovation, which is going to include a lot of materials like wood, slate, and iron that we thought would look nice with the existing brick. The rest of the kitchen is going to be lots of work, so stay tuned for the transformation!
Here's the white wall where the chimney was covered:
And here's the uncovered chimney:
This is the beginning of our kitchen renovation, which is going to include a lot of materials like wood, slate, and iron that we thought would look nice with the existing brick. The rest of the kitchen is going to be lots of work, so stay tuned for the transformation!
Sunday, April 25, 2010
a levitating cat?
Tuesday, April 20, 2010
the centenarian through time
We've been pouring cash into our house, but recently we made our best investment so far. And it only cost $15.
We managed to get our hands on historic photos of the Centenarian. The Puget Sound Regional Archives has photos of most houses in Seattle since 1937. For record keeping, tax purposes, and to generally keep track of change over time, the City photographs each home every so often. So we got a few snapshots of our little bungalow here in Ravenna - its seen good times, its seen bad, and its seen times at which it should have been demolished. We thought our little place looked shabby when we bought it, but look at 1982 - I think our house was ground zero for dealing crack.
The last photo is from the day we bought the place. Stay tuned for one final photo, when we finish our renovations!
1937
1968
1982
2009
Friday, April 2, 2010
succulent lover
John is very proud of his framed succulent box, so I wanted to share his handiwork. We found the idea in a magazine a month or so ago. That same weekend we went searching for succulents to buy so John could start his project, and alas... no one was selling succulents that early in the season. It ruined John's entire weekend...
So last weekend we found some succulents for sale, and John's finally happy again. The idea here is for the succulents to take root in the soil/wire mesh that's build into the frame. Then, you can hang it on the wall like a picture. Pretty cool. This is just a little one - about 8"x6". Ultimately, we'd like to build some bigger ones for the porch and other spots around the outside of the house. John would be happy to share the directions if any of you are inspired.
Saturday, March 6, 2010
what to do with a sideyard?
Spring has sprung in the PacNorWest. It sprung like a month ago. Trees and plants have been blooming like crazy already, the daffodils are yellowing the landscape, and Seattleites - drawn outside by an unfamiliar sun - have started prepping their gardens for growing season 2010. We are no different, and the promise of a 60 degree March day with no clouds and no chance of rain brought us out-of-doors too. Last weekend and this have been gorgeous, so we decided to transform our sideyard from a grassy, biological wasteland to a garden of eaten. Check out our before, during, and after pics below.
When we first saw this house with our real estate agent, we thought the sideyard would be a great place for raised veggie beds.
Adrienne made all those little pots out of newspaper and planted lettuce, onions, broccoli, cauliflower, tomatoes, cherry tomatoes, peppers, melons, pumpkins, cucumbers, amaranth, millet, basil, cilantro, sage, chives, dill, camomile, marigolds, calendulas, alyssum, leeks, cabbage, kale, chard, mustard, okra, squash, mint, yarrow...and others we can't remember. They are all starting to grow in our basement grow room. A cherry tree, fig tree, blueberry bushes, asparagus starts, and salmonberry just arrived in the mail.
Got this ginormous truck to haul our 4 yards of dirt...which equals 8,000 lbs.
Shovelin dirt.
Haulin dirt.
The finished product (thank you, Vanna).
Subscribe to:
Posts (Atom)