...but I have to say Adrienne and I live in amazing place. Today I rode the ferry to work. No commuting in traffic, not buses, no trains. Instead I rode a boat to work. And from the boat, I could see in crystal clear imagery two ENORMOUS volcanoes capped with glaciers, a city's skyline graced with mountains in the background and an ocean in the foreground, islands dotting the seascape, and sailboats taking advantage of both the sun and the wind. And my meeting focused on developing strategies to protect and restore the Puget Sound, one of the world's most biodiverse and unique waterways.
Adrienne's day wasn't entirely different. She spent the day educating community college professors as an invited speaker at Western Washington U about ocean acidification, its implications, and how these educators can share stories and lessons with their students. She just called me and told me she's on her way home, and that the moon is full and rising over the islands and the mountains of north-western Washington. I stepped outside to see if I could see this moon and snapped a photo of it rising in the east over our neighborhood. Not a great picture...but conveys the moment.
Tuesday, August 24, 2010
Sunday, August 22, 2010
all you need is 1000 corks!
If you were to tell me that Adrienne and I are the most creative people in the whole wide world, I might just believe you. Check out our super cool new corkboard that we just made! We've been saving our corks for years (yes, years) without a grand plan of what to do with them. This is what we came up with - and we didn't even get the idea from Sunset magazine. We figured it out all on our own. What makes it even cooler is the frame was made from the old hardwood floors from our house. Some of the boards were beyond repair and needed replacing - so with the old scraps, we made this frame.
We're pretty proud, I must say...
Monday, July 26, 2010
another (multi) weekend project
What drew us initially to the Centenarian was its amazing backyard. It was the perfect amount of space for what we wanted to do - which in the end will include a deck, vegetable garden, potting station, patio, fountain, fire pit, outdoor kitchen with BBQ and wood-fired oven, a fern grotto, split rail fence, native garden demonstration...and maybe even a vineyard if we can find rain-loving grapes.
But the one thing we didn't like was the crummy chain-link fence separating us from the neighbors. Its no big deal when no one's hanging out in the backyard - but now its summer, and our backyard BBQs were clashing with their backyard BBQs. It was about to get ugly in the urbs. So we collaborated with them to build the beautiful 95 ft long viewing obstruction you see below. Garden before-and-after pics only add to the dramatic effect.
Before
After!
Friday, July 16, 2010
research diversion...
Follow the link below to read an article I (Adrienne) wrote for a scuba magazine - Sources: The Journal of Underwater Education. Nothing like a little light reading on ocean chemistry for the weekend!
Saturday, July 3, 2010
project closet
When we moved in here, the washer and dryer were squarely part of the kitchen and we used them as an extension of our limited countertops. There was also a HUGE closet that connected to the kitchen, but no closet at all in the master bedroom. Clearly, there was a problem here waiting for a clever solution.
That solution: cut a doorway from our room into the HUGE closet adjoining the kitchen, then cut that closet in half leaving one part for our clothes and the other for our washer and dryer. This was one of our many projects around this place - check out its progression from start to finish.


That solution: cut a doorway from our room into the HUGE closet adjoining the kitchen, then cut that closet in half leaving one part for our clothes and the other for our washer and dryer. This was one of our many projects around this place - check out its progression from start to finish.
Newly cut doorway into our room
Cutting the closet in half
Make sure its square...
Now one closet = two
They fit!
A little paint, a little tile...
Done!
Thursday, July 1, 2010
it feels great to have gas...
I'm serious. And just to make it clear, I am talking about a gas stove. Adrienne and I have been cooking on old electric coil ranges for a couple of years now. As a matter of fact, our old house's range was temperature controlled by 3 buttons for each burner - low, medium, high. This is not the way foodies like to prepare their meals.
All is changed as of today - out with the old, in with the new. And the new is stainless steel with 5 burners fueled by pure, blue-flame producing GAS...the epitome of awesome.
Can't wait to see how dinner turns out tonight....
All is changed as of today - out with the old, in with the new. And the new is stainless steel with 5 burners fueled by pure, blue-flame producing GAS...the epitome of awesome.
Can't wait to see how dinner turns out tonight....
Monday, June 28, 2010
our kitchen WILL rock!
Adrienne and I took an adventurous weekend break from our kitchen remodel, which was awesome - she wants to blog about it later, so I will offer no hints as to why it was awesome. But it was totally awesome. I will say no more.
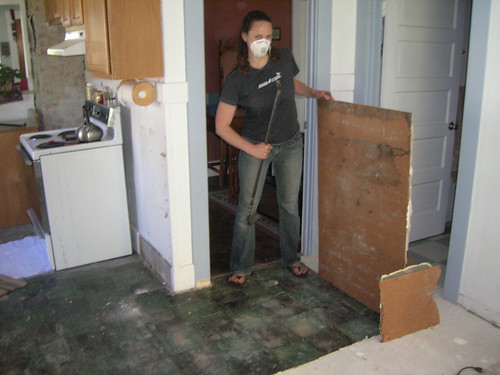
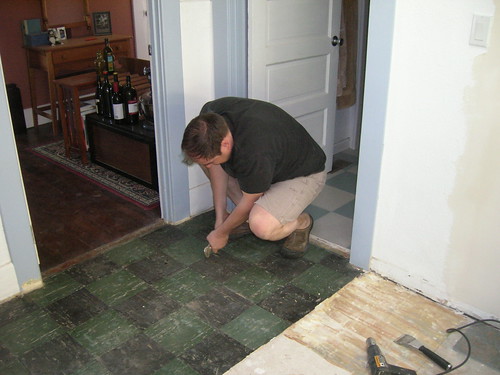
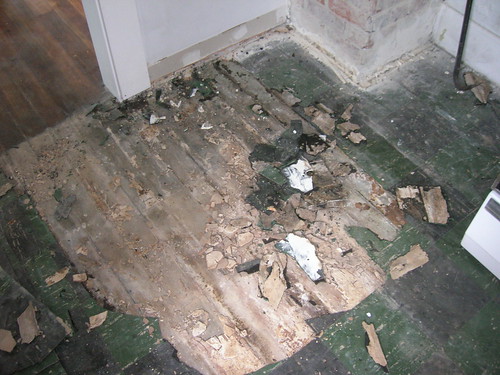
So our kitchen remodel continues. Plaster over old brick chimney - gone. Umpteen-layers of kitchen substrate (i.e., linoleum, marmolium, old hardwood floors, tar, glue, paper, faux-wood wall paneling, nailed every 3 inches...etc) - up. Decorative railing circumnavigating the kitchen walls - removed. Post supporting skylight infrastructure - replaced with exposed wood beam. Cheap checkerboard linoleum - trashed and replaced lovingly with quarried multi-colored stones. Cabinetry - being built. Sink - recycled hammered copper basin awaiting cabinets. Stove - here and waiting to receive a new gas line since only electric exists.
Yes, our kitchen WILL rock! Below are some updates of what we've been up to.
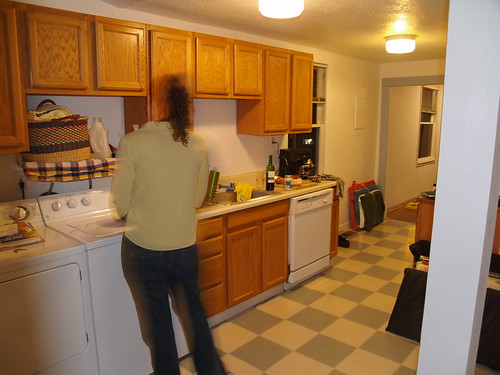
Our kitchen before... note the linoleum (which we will call "layer 1"), the white post obstruction, and the washer and dryer (used here as additional countertop).
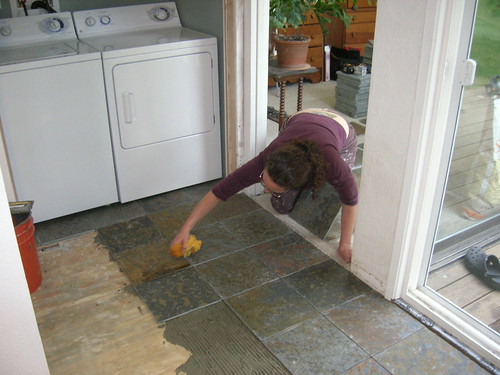
Wow! The washer and dryer in a closet. How revolutionary! And the beginnings of tiling...
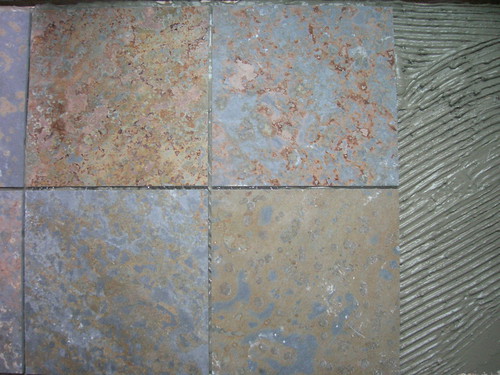
New tiles close-up. Cool, huh?!
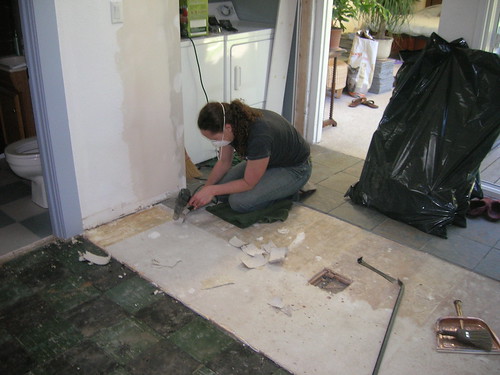
The subfloor of the old portion of the house and the addition built by previous owners (who apparently were not rocket scientists) are different heights - by a lot! So the tiles had to go directly onto the subfloor on the new portion of the house, and therefore, a layer of paper (let's call this "layer 2") had to go...
The layers under the linoleum: wall paneling (yes, wall paneling on the floor) and some type of particle board... "layers 3 and 4".
500 bajillion staples and nails...
And "layer 5", the old marmoleum, glued on with tar, of course!
So our kitchen remodel continues. Plaster over old brick chimney - gone. Umpteen-layers of kitchen substrate (i.e., linoleum, marmolium, old hardwood floors, tar, glue, paper, faux-wood wall paneling, nailed every 3 inches...etc) - up. Decorative railing circumnavigating the kitchen walls - removed. Post supporting skylight infrastructure - replaced with exposed wood beam. Cheap checkerboard linoleum - trashed and replaced lovingly with quarried multi-colored stones. Cabinetry - being built. Sink - recycled hammered copper basin awaiting cabinets. Stove - here and waiting to receive a new gas line since only electric exists.
Yes, our kitchen WILL rock! Below are some updates of what we've been up to.
Our kitchen before... note the linoleum (which we will call "layer 1"), the white post obstruction, and the washer and dryer (used here as additional countertop).
Wow! The washer and dryer in a closet. How revolutionary! And the beginnings of tiling...
New tiles close-up. Cool, huh?!
The subfloor of the old portion of the house and the addition built by previous owners (who apparently were not rocket scientists) are different heights - by a lot! So the tiles had to go directly onto the subfloor on the new portion of the house, and therefore, a layer of paper (let's call this "layer 2") had to go...
The layers under the linoleum: wall paneling (yes, wall paneling on the floor) and some type of particle board... "layers 3 and 4".
500 bajillion staples and nails...
And "layer 5", the old marmoleum, glued on with tar, of course!
And where we are today... cabinets going in this weekend or next so stay tuned!
Subscribe to:
Posts (Atom)